By Dan Beard
How to Build a Fort and Council-Room for the Sons of Daniel Boone

Fig. 118.
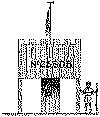
A Stockade, Fort, or Club-House for Scouts
It is a simple thing to furnish the loyal scouts with plans and descriptions of a Fort, but it required some little thought and study to work out the problem of a door-less building.
It is an easy matter to build a house which will accommodate the boys for a meeting-room and social purposes, but there are always a lot of Indians and Simon Girtys--in other words, gangs of rough boys-who would dearly love to sneak into the Fort during the absence of the loyal S. D. B.'s, and to prevent this the Founder has devised a block-house supported in the center by column G and posts on the corners (See Fig. 118).
To build this mystery Stockade some timber is necessary, and the amount of lumber required is altogether dependent upon the size of the building you intend to erect. We will suppose that the Fort is to be 12 X 12 feet in dimensions; then we will require some pieces of two-by-four-inch lumber for the framework. We want to set the block-house high enough to give head room underneath-say, for instance, we make it 5 1/2 feet above the ground.

Fig, 119.
Framing the Mystery Fort
We will then need four pieces of two by four, each 51 feet long (M M M M, Fig. 119). We will also need four pieces of two-by-four-inch scantling each 7 or 8 feet long. (See N N N N, Fig. 119.) Now spike the M and N pieces together, as in the diagram, and then nail the pieces S S to N and N so that the S pieces rest on top of the M pieces, as in the floor plan (Fig. 120); this gives you the front and rear floor sills. Now take the four short pieces of wood one and one-half or two feet long (Q Q Q Q) and nail them securely to the N posts so that the tops of the O pieces will be even with the top of the sills (S S). Upon the Q pieces you rest the two side joists, as in the diagram (Fig. 119), and securely nail them in place. This will give you the frame, or table, upon which the block-house is to rest, but to make it more secure we will build the pier G in the center by erecting the four A posts.
Then lay the five other floor joists with their ends resting upon the S sills. Nail the uprights A A A A to the third and fifth floor joists, as in the diagram (Fig. 119). Connect the bottom of the G pier with the ground sills like the one marked P in the diagram. The detailed drawing near the knee of the boy with the saw explains how the P pieces are notched to fit the A pieces.
The top of the G pier will require four pieces--two each for the front and rear-because there is a joist running through the center of the top of the G pier. Nail these top pieces to the A uprights as you did at the bottom ends of the A pieces, but they will have to be toe-nailed to the middle joist-that is, the nails must be driven in from the side or top and bottom slantingly, as shown in the detailed drawing above S (Fig. 119). These diagrams may look complicated, but there is no work on this building which cannot be understood and accomplished by boys. It is the simplest sort of building. The G pier, for instance, is nothing but a box, and the framework for the platform is simply a large table.

Fig. 120.
Floor Plan of the Fort
Fig. 120 shows a plan of the floor-that is, a view of it looking from above. The letters on all these diagrams are so arranged that the same letter represents the same piece or part wherever it may occur. You will notice in Fig. 120 that the M pieces are not shown, and when you examine Fig. 119 you will understand the reason to be that the S sills resting on top of the M pieces conceal them from view on the floor plan.

Fig. 121.
View of Unfinished Mystery Fort
Now that we have got the platform built, the rest is simple work, and you will see by Fig. 121 Why the N pieces were made longer than the M pieces, for in Fig. 121 you will notice that the uprights (R R R R) of the shed are nailed to protruding tops of N pieces and rest upon the sills (S S). In Fig. 121 you will see that pier G is all boxed up. You will also notice two pieces (V V) on the end of the shed, nailed there in the form of an X. These V pieces are temporary braces, and if the nails in these braces are not driven all the way it will make it easy to withdraw them.
The two boards marked W are nailed there only temporarily, to help support the roof until the front and sides are nailed to it. The tree on top of the boards (W), with the ribbon flying from it, is only placed upon a building when the framework has been completed without accident. This is an old and pretty custom of builders, which may be followed by the Sons of Daniel Boone.
The simplest way to make a roof is to make a shed roof slanting from the front to the rear. To calculate this slant, give plenty of head room at the rear end, and then make the front end two or three feet higher.
After the R pieces are erected and cut off to the proper proportions, nail the T rafters in place, as in Fig. 121. Then board the roof as in the same diagram. To prevent the roof from leaking, the cracks between the boards should be covered with narrow boards nailed in place on the roof. The ends of these strips can be seen projecting above the boards on the roof of Fig. 121.
The laying of the floor and the boarding up of the sides requires no especial skill, but only care.
The front and sides of the Fort should be made like the top of an old-fashioned castle, as in Fig. 118. The sides will, of course, extend above the roof, but in the rear the roof projects over the wall, and hence the boards cannot extend above the roof at this point. However, if you have three sides embattled it will give a noble and impregnable appearance, and visitors are not supposed to approach from the rear.
You may have windows in the side or rear, with heavy wooden shutters to cover them when the Fort is closed, bur for the front cut loop-holes, as shown in Fig. 118.
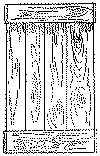
The secret doorway of the Daniel Boone Fort is made upon the rear end of the G pier, and consists simply of two boards fastened together with the battens (B B B) and hinged with cellar-door hinges to the boxing of the G pier, as in Fig. 123.
The battens (B B B) are made a little longer than the door is wide, and as the door opens inward when you close it the projection of the battens will prevent the door swinging out. To conceal the door, and also to further prevent it from swinging out, nail a base-board on all four sides of the G pier and a similar one at the top of the G pier.

Fig. 122.
The Appearance of the Door from the Outside
The appearance of the door from the outside (Fig. 122) will then be the same as the other three sides of the G pier and give no indication of a concealed entrance.

Fig. 123.
Inside of the G Pier
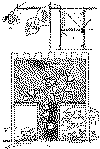
To enter the council-room from the inside of the pier it is only necessary to have a simple trap-door in the floor, as shown in Fig. 126. This trap-door is made by sawing out a section of the floor and is only large enough to admit the body of a boy. It rests on half of the third joist and is hinged over the middle joist.

Figs. 124-126.
Drawing Showing the Fort Sliced in Half,
Displaying the Interior;
also the
Workings of the Mystery Door.
The trap-door is a simple thing to construct, and the diagram (Fig. 126) explains its use.
But we must secure the secret doorway so that when the Fort is unguarded the doorway will be securely barred. To do this without lock or key we take a stout board just long enough to reach from one side to the other of the G pier. We hinge this board with a couple of strong hinges to the front of the inside of the pier (Fig. 124); we then fasten a screw-eye to the top of the board, another screw-eye to the floor of the council room, and another one near the wall of the council-room, as in Fig. 124.

Fig. 124
Close-Up
To the screw-eye in the door we attach a piece of picture wire, run it through the other screw-eyes, and then through a gimlet hole in the wall and attach a button to the end of the wire, as in Figs. 124 and 125. Fig. 125 shows a little shutter made of a rectangular piece of board fastened to the wall with a screw at one end. This shutter may be moved from side to side by pushing its free end this way or that. The purpose of the shutter is to cover and conceal the button.
Those in the secret, when they want to enter the Fort, will push the shutter (Fig. 125) to one side, take hold of the button with their hand, and by giving it a steady pull, they will lift the hinged board, as shown by the dotted line in Fig. 124, until the board rests flat against the perpendicular side of the G pier. This, of course, unbars the door, and the pier may be entered by simply pushing open the door.
If you are careful not to give away this secret to the other boys, no one can possibly get into your Fort without the aid of an axe, and if there are any Simon Girtys so reckless as to hammer and split their way in, they will make so much noise about it that they cannot fail to attract attention. We will not attempt to build a Fort of boards which will withstand a battering-ram or a sledge-hammer attack.
I think, however, a Fort built on the plans here given will be secure against intruders so long as you keep the secret to yourself; and if the secret leaks out you have simply to find a new place and a new method of concealing the button attached to the end of the wire and the secret is again yours.